Features listing
HOW FEATURES WORK
Features must first be registered on the shop using this “Features” tab under the “Attributes & Features” page from the “Catalog” menu.
Then, they can be configured on a per-product basis, from the “Product” page under the “Catalog” menu.
👉 See the specs of the add/edit product page
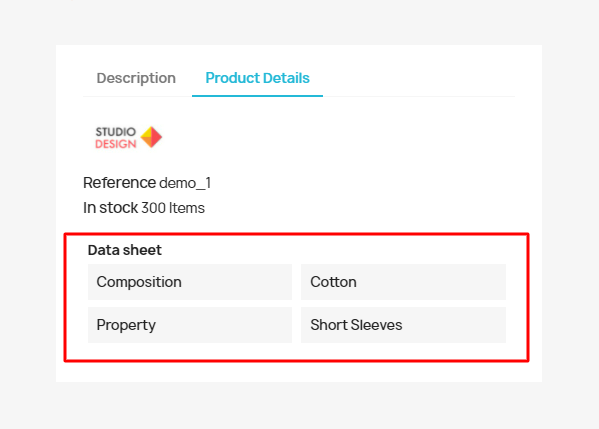
Once configured on a per-product basis, the features and values of the products are displayed on the front-office product page, in the “Product Details” tab.
FEATURES
Call to action
2 call to actions are displayed in the header of this page:
- Add new feature
👉 See the specs of the add/edit feature
- Add new feature value
👉 See the specs of the add/edit feature value
Settings wheel
When clicking on the settings wheel, the following options are displayed:
- Refresh list
After clicking on it, the page is reloaded. Sorts and searches are kept.
- Show SQL query
After clicking on it, the SQL query is displayed in a modal. The SQL query takes into account filters and sorts that have been done.
There are two buttons:
- Close: After clicking on it, the modal is closed
- Export to SQL Manager: After clicking on it, the SQL query is opened in Advanced parameters > Database > SQL Manager
- Export to SQL Manager
After clicking on it, the SQL query is opened in Advanced parameters > Database > SQL Manager
Bulk actions
Clicking on the Bulk actions button allows users to perform bulk actions for selected features (using the checkboxes). A user can:
- Select all/Unselect all: this button will select/unselect all the checkboxes at the beginning of each row of the listing.
- Delete selected: This button will delete the selected features. After clicking on “Delete selected”, a modal with the title “Delete selection” is opened asking to confirm or cancel the action: “Are you sure you want to delete the selected item(s)?” (See issue #14462). The action can be canceled by clicking on the cross or on the cancel button. After clicking on “Delete” button, the selected features and all their values are deleted, a successful message is displayed “The selection has been successfully deleted.”
Columns
The page displays the features list with the following columns:
- ID
It’s possible to sort by id asc or desc and search by id.
- Name
It’s possible to sort by name asc or desc and search by name.
- Values
It indicates the number of values for each feature.
- Position
The position of each feature can be changed by clicking on this column and by moving it up or down. After changing the position, the message “Successful update.” is displayed.
- Actions
View. This is the main action and it can be performed by clicking on the line.
👉 See the specs of the view feature
Edit. The user can edit a feature as often as necessary.
👉 See the specs of the add/edit feature
Delete. A feature can be deleted by clicking this button. After clicking on Delete, a modal with the title “Delete selection” is opened asking to confirm or cancel the action: “Are you sure you want to delete the selected item(s)?” The action can be canceled by clicking on the cross or on the cancel button. After clicking on “Delete” button, the feature and all its values are deleted, a successful message is displayed “Successful deletion.”
Multistore
Only the features created in the selected store or store group (through the context) are displayed. For example, let’s say there’s the following configuration made:
- Group 1
- Shop A
- Shop B
- Group 2
- Shop C
If the group 1 is selected as context, then the features created in Shop A and Shop B will be displayed.
If the Shop A is selected as context, then the features created in Shop A will be displayed.
If “all shops” is selected as context, then the features created in Shop A, Shop B, and Shop C will be displayed.