How to write on this blog
or: How we tried to ensure that only developers could write on the devblog :)
When we started talking about a dev blog among us, we thought about who could write, what we wanted to talk about, who was going to review the articles…
Technically, WordPress was the first solution we reviewed but after giving it more thought we realized it would be too much of a hassle to maintain: plugin updates, core updates, database backups, security issues, etc.
We then came up with a better idea: Jekyll.

Jekyll uses a set of configuration and data files, article files (written in Markdown or pretty much any other format), and resources (CSS, images, fonts, etc.) to generate a fully static website, made only of plain HTML files. Since you can version everything with Git and you don’t have to set up any database, it seems like the easiest ‘CMS’. So that’s what we’re reading now: plain HTML generated from Markdown markup through Jekyll!
This blog is also meant to become the ‘place to be’ for the PrestaShop tech community, and Jekyll is definitely the best option out there – and you can actually make a Pull Request on GitHub to edit any content. Actually, GitHub’s Pages features is powered by Jekyll too, so we’re not really choosing in the blind here :)
TL;DR
Note
First: tell us what you want to write about! We won’t accept just about any submission :)
Write to us with your idea (we can be reached at [email protected]), with a rough idea or the whole thing ready, and let’s talk about it. Once we agree on the subject, then you are good to go!
You don’t have to read all the details below: if you want to write an article right away, you can simply follow those steps:
- Fork the repo (see GitHub doc)
- Download this sample file.
- Rename it according to the date and your topic (NOTE: the date in the file name is mandatory).
- Move it to the right folder:
news/_postsfor a blog post,howtos/CATEGORYfor a tutorial. - Write it.
- Make a Pull-Request on the initial project you forked.
You can even get GitHub to do most of the work for you: see the video below.
The whole #!
You only need this section if you intend to set everything up locally. You don’t have to do that, but let’s be honest, when you write your article, you want to preview how it will render, before sending it over to us :)
Still, this is pretty much developer-targetted, so beware: technical stuffs ahead! :trollface:
Installing the required software
In order to get the blog working locally, you will need a few (command line) tools. I’ll let you find out how to do so on their respective websites, according to your OS.
Download them, install them, then come back here for more! Of course you can also read their doc and get acquainted about the awesome Bundler tools – they might be of great use for your other web projects!
Forking and cloning
Next, fork the prestashop.github.io repo into your GitHub account, then clone it on your local machine.
Installing dependencies and running Jekyll
Bundler will install Jekyll and all the Ruby dependencies. We’ll also use it to run the blog on a local server.
$ bundle install
$ bundle exec jekyll serve
---
Server address: http://0.0.0.0:4000/
Server running... press ctrl-c to stop.
Open a browser window, and go to http://0.0.0.0:4000/, and you should see the blog running.
Note
Thejekyll serve command only watches content and styles. So if you are changing any plugin or any line in your _config.yml, you’ll have to quit (ctrl+C) and rebuild.
Creating your article
Directory structure
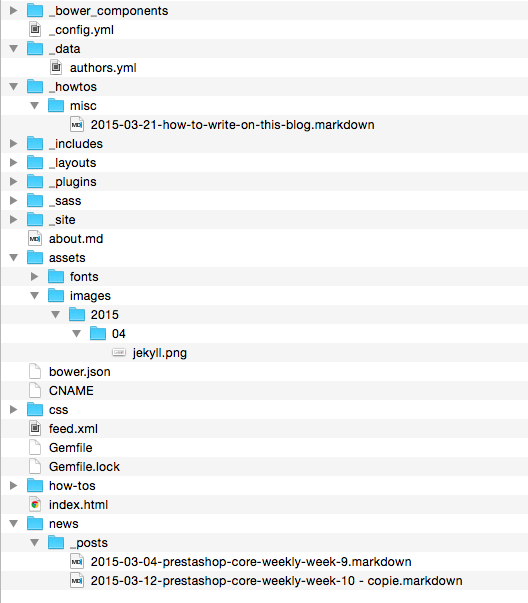
As a contributing writer on the Build blog, you are mostly interested in /assets, /howtos and /news folders.
Article directories
With Jekyll, the location of your files matter. On this blog, we have two kinds of articles:
- News: They live in the
news/_postsfolder and they show up on the home page. - How-Tos: They live in the
howtosfolder and are sorted by topic. These posts are displayed on the home page as well as the How-Tos page which is sorted by topic.
Note
If you need to create a new topic, create a subfolder in howtos and edit the howtos configuration in _config.yml.
The topics are displayed in the same order as shown in the _config.yml file.
Please ask us before creating a brand new topic!
File name
Any article of any type has to be in a file named using the following the time-based pattern. Make sure to follow that convention: if you do not, Jekyll won’t recognize your file.
YYYY-MM-DD-some-hyphen-separated-name.markdown
File header (YAML Front Matter)
Jekyll makes it really easy to set your post meta information. The top of your file has to include some information like ‘author’ or ’layout’, in YAML format.
Copy and paste the following lines at the top of your new file, and customize the relevant values.
---
layout: post
title:  "Here goes the title of your article"
subtitle: "This text will be displayed below your title"
date:   2015-03-04 15:12:00
authors:  [ julienbourdeau ]
icon: icon-pen
tags: [sample, tags, example]
published: false
---
I assume you will understand what you are supposed to change. Icon can be any icon from FontAwesome. You can also find available icons on the PrestaShop Icon Font Documentation page.
Important
Articles must be submitted with the ‘published’ setting set to false. We will only publish it after review.Making sure you’re an author
If this is your first article, you will have to add yourself to the author list. Open up the _data/authors.yml file and add your personal details. The first line is your ID and that’s what you have to use in your article header.
Now fill up as much info as you can. display_name and avatar are mandatory.
Exemple:
julienbourdeau:
    display_name: Julien Bourdeau
    role: Core developer
    avatar: https://avatars1.githubusercontent.com/u/1525636
    email: [email protected]
    twitter: julienbourdeau
    github: julienbourdeau
    forum: 761923-julien-bourdeau
    crowdin: julienbourdeau
    website: http://www.example.com
    description: >
        This is a description of the author with details about what he really does
        and the cool thing is: it's multiline.
Writing your article
Markdown & Liquid
All article must be written using the Markdown syntax. With Jekyll, we use Kramdown as a markdown converter, and the Liquid template engine.
If you are struggling to get the result you want, you can still use pure HTML.
References:
Tips and tricks
This part describes some important tricks to write a good article.
Images
Images have to be in the assets/images/YYYY/MM folder (with a custom YYYY and MM, of course): find or create the subdirectory according to the date of the article.
Using Markdown, your image should look like this:

Code
Inline code
When you need to refer to a CSS property, a specific file, a function name or anything similar, use the following syntax to highlight it in your text:
`define('_PS_DEV_MODE_')` in file `config.inc.php` or `Tools::getValue()`
Block of code
When it comes to serious code blocks, it’s always better to use syntax highlighting. With Jekyll, it works a bit differently compared to GitHub (because GitHub uses their own GitHub-flavored Markdown): you have to use a Liquid tag: {% highlight LANG OPT_1 OPT_2 %}
{% highlight php startinline=true linenos %}
class IndexControllerCore extends FrontController
{
	// SAMPLE CODE
	public function initContent()
	{
		// SAMPLE CODE
	}
}
```
Parameters:
| Parameter | Description |
|---|---|
LANG |
Mandatory. Can take almost any language: html, php, ruby, javascript, etc. |
startinline=true |
Optional. Only used for PHP, this way you don’t have to write <?php and ?>. If you are mixing up PHP and HTML, don’t set this parameter. |
lineos |
Optional. Display line number. Default: false. |
Embed a GitHub gist
If your code will or may be updated, you can easily embed a a GitHub gist using the embeded HTML code.
<script src="https://gist.github.com/your-username/your-gist-id.js"></script>
Icons
We use a simple FontAwesome plugin that lets you display any icon using the following syntax:
<i class="icon-store"></i>
You can find available icons on the PrestaShop Icon Font Documentation page.
Alerts
If you want to highlight some content (hint, note, tip, alert, etc.), we have few types of highlighting available. They are based on alerts from Bootstrap.
{{% notice type="note" %}}
You content goes here. **Markdown** _is_ `supported`.
{{% /notice %}}
You can use: note, info, important, tips.